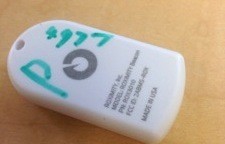
![]() iBeacons, revealing the relatively simple innards
iBeacons, revealing the relatively simple innards
iBeacons are a low-power bluetooth device Apple quietly release as part of the iOS7 launch recently. They’re the Apple alternative to NFC, a small location aware device which developers can use to track user’s proximity to a location, and trigger various actions in a mobile app. Potential use cases include payments, exhibit information, proximity advertising and promotions (read: spam), and many more besides. iBeacons are a departure from the normal way Apple deals with Hardware – interestingly, any vendor is free to make iBeacons which will work with Apple SDKs. The devices are both simple and cheap, and it’s pretty easy to hack one together with a Raspberry Pi and a bluetooth receiver, or an old iPhone.
What is an iBeacon?
An iBeacon is a Bluetooth Low Energy device that transmits some important information back to a mobile device to identify it, and it’s location.
- Proximity UUID: The ‘unique’ identifier of this type of iBeacon. Unfortunately, this isn’t unique at all – more on that later.
- Major: A number that identifies a group of iBeacons, e.g. all those deployed within a specific store
- Minor: A number (which at least should be unique – finally!) to identify the specific device
- Proximity: A number which identifies how close the beacon is – Far, Near or Immediate.
Identifying iBeacons
As eluded to in the above bullet points, the UUID is not unique. If you’ve made your own iBeacons, great, you’ll use this number to identify all the beacons you’ve made.
If you’ve bought iBeacons, they’ll already have been assigned an UUID by the manufacture. Here’s where things get a little messy – manufacturers don’t always provide the end user with the UUID. This locks you into using their SDK toolset (no thank you), rather than just interfacing directly with the iBeacons using the iOS SDK APIs.
Some quick googling reveals the UUID of some common iBeacon manufactures – as to which one, it’s just trial and error I’m afraid:
- Roximity: 8DEEFBB9-F738-4297-8040-96668BB44281 || 8deefbb9-f738-4297-8040-96668bb44281 [2]
- Estimote: B9407F30-F5F8-466E-AFF9- 25556B57FE6D [3]
- Kontakt: ed3a6985-8872-4bb7-b784-c59ef3589844 [4]
Now that you have the Proximity UUID, you can start ranging for iBeacons in your app. All three of our Beacons were identical in every way – there was no unique identifier on the casing, so I enabled the beacons one by one, logging the Major and Minor IDs as I went. Turns out, all our beacons have a Major ID of 1, and unique minor IDs.
Taking note of this, and reaching into my developer toolkit, there’s two things I did. First, we can construct a simple switch statement that does special logic for each beacon in our iOS app. Then, I use a very advanced piece of equipment known as a Sharpie, so I don’t mix up the beacons!
A note on Proximity
The proximity of these devices isn’t particularly precise. The near and immediate values in particular look to fluctuate quite rapidly. For accurate readings, some slightly more complex logic than illustrated in this example code may be needed in the didRangeBeacons delegate function, for example taking an average proximity across the last N calls.
Another interesting observation I made was that across our three small offices, all adjacent, the ‘near’ value wasn’t wide enough to distinguish one from the other, and the ‘immediate’ value was too close to identify an office. It seems these devices don’t function well on such a small location scale.
Enter mBaaS
We’ve hardcoded a few iBeacon Secondary IDs and the relevant responses for these in a switch statement – but let’s make this a little more dynamic. I’ve added my project to FeedHenry, and I’m going to make use of the FeedHenry Data Browser to set up a collection of iBeacons that I can easily mange. I’m also going to write some simple cloud code to return an object of iBeacon minor ID key, object value pairs back to the client.
 My project setup in FeedHenry mBaaS
Lastly, I’ve altered the mobile app to request the list of iBeacons from the FeedHenry cloud, and draw the label, sublabel, and colour from this description. I can now easily change my iBeacon text labels and colours that show when the beacon enters range.
Here’s a video of it all in action:
How about Indoor Mapping?
One of the big implications of these new devices is their potential use for indoor mapping. Unfortunately, the usefulness of three beacon which can transmit no more than signal strength (and thus, in turn, an estimation of proximity as we use above) makes for a poor location monitoring device out of the box. I tried some simple triangulation logic, and took the beacons into the car park of our office. Although there was clearly some consistency in the (x,y) coordinate pairs I was receiving at each beacon, I found no correlation between the number range at each triangular point and a cartesian plane.
In summary: Unless you have a lot of time on your hands, or a higher level API becomes available for triangulating position based on iBeacons, it’s probably not worth the effort.
Conclusion
There are plenty of potential applications for this technology in retail, manufacturing, museums, healthcare, and more besides! Of course, this iOS demo app could be expanded to more advanced uses of the iBeacon SDK – but this quick example illustrates the concepts. Hopefully this primer shows how to get up and running with iBeacons, and illustrates how easy it is to manage these in the FeedHenry cloud.
[1] https://developer.apple.com/library/ios/documentation/userexperience/conceptual/LocationAwarenessPG/RegionMonitoring/RegionMonitoring.html (Monitoring Beacon Regions)
[2] http://stackoverflow.com/questions/21208634/detect-roximity-ibeacon-without-roximity-sdk
[3] https://community.estimote.com/hc/en-us/articles/200761958-Advertising-Packet-Estimote-s-Proximity-UUID
[4] http://docs.kontakt.io/beacon/kontakt-beacon-v1.pdf